Wednesday, February 27, 2013

Homemade Valentine's Saves $$

This year Misses is in preschool. Her class has 20 students in it, and Misses needed to take a Valentine to school for each of them. After a couple trips to the store, looking at the options and prices for Valentines, I decided to see if Misses could make her own.

Making Valentines is a great activity for my daughter. She loves to do all things crafty. Later that week, I was flipping through a magazine and saw a child stamping red hearts with a toilet paper roll. I instantly got excited. I know, I know, I'm a dork. I just love saving money.

I set forth to collect all the supplies we needed to make these cute Valentines. Luckily, I had everything we needed.

Supplies:
card stock
paint
toilet paper roll
marker

Instructions:
Cut the card stock in strips and then cut the strips in half. You are making a little post card Valentine. Then write Happy Valentine's Day! Next, bend the toilet paper roll into a heart shape. Have your child dip the roll into the paint, and stamp it onto the card.


Let them dry. If you want to add a piece of candy or pencil that is up to you. We added pencils by taping them to the back. The total cost of these Valentine's were $1.94 for the pencils, since I had all the other materials on hand. Not to mention, putting these together was a nice activity Misses and I were able to do together. 

Monday, February 11, 2013

Cheerio Snacks

Last Christmas, I made party mix for friends and family. I got a little over excited with the great cereal prices and now have 2 big boxes of plain Cheerios. My kids will not eat them plain. I will only eat them for breakfast with about a 1/4 cup of sugar added to them. You know, just enough to scrape it off the bottom of the bowl with each bite. That doesn't work for me right now, because I am trying to loose weight. So I turned to the trusty Pinterest to see what I could do with these Cheerios.

I had pinned this recipe awhile ago.


• 1 c. sugar
• 1 c. corn syrup
• 1 c. creamy peanut butter
• 1 t. vanilla
• 5 c. Cheerios (the original recipe called for Honey Nut)
   I added red chocolate drizzle to the top of mine for Valentine's Day

In a large sauce pan, combine sugar and corn syrup. Bring to boil over medium heat.
Allow mixture to boil for one minute and remove from heat.
Add peanut butter and vanilla to mixture and mix until smooth.
Add Cheerios and mix until all coated.
Drop mixture by spoonful onto waxed paper and allow to cool.

Makes approximately 2 dozen.

Thanks to http://kathiecooks.blogspot.com/2010/01/cheerio-treats.html for this recipe.

If I did the math correctly, each treat has roughly 168 calories. I figured one to be the serving.


Trail Mix with Cheerios
This recipe, I made up by adding ingredients I already had on hand.

Ingredients

2c. Plain Cheerios
.5c. Blueberry Craisins
.5c. Cherry Craisins
1c. M&M

Put all in a large resealable container and enjoy!


Thursday, January 17, 2013

Almost Old Mother Hubbard

As the nursery rhyme goes . . . Old Mother Hubbard went to the cupboard to give her dog a bone. When she looked the cupboard was empty. This is almost the scenario in my house the last couple of days. As you can imagine, dinner here as needed to be creative and tasty. Which can be a difficult accomplishment with a picky husband and two little kids.

Okay, I need to explain why there is little food in my house right now. We are at the point where we need everything, and I coupon to help keep the food budget in check. I have Misses (4) and Bubba (20 mos.) with me almost all the time. I know from interesting experience that trying to buy a lot of groceries and use coupons at the same time does not make for a delightful time for any one within a 20 foot radius. Not to mention, Bubba likes to throw things out of the cart while we are shopping. I can't prevent that from happening when the cart is over flowing. Plus, it has been pretty cold out, and I haven't wanted to bring all the groceries in alone with my little helpers. Tomorrow, there will be full cupboards, since my husband has a day off!

Since there was little food this evening, I found all the stuff I needed to make homemade pizza.

Ingredients:


Pie crust
Cheese
Pepperoni
Tomato Sauce


Instructions:


Lay out pie crust on baking sheet and use a fork
to poke holes in it.

Bake it in the oven for 10 min.


Remove it from the oven and spread the sauce on top.


Add the pepperoni.


Spread the cheese on top.


Then add any other toppings you like or have on hand. We added onions and green peppers. Put it back in the oven for the 15 min. or until crust is fully cooked and cheese is melted.


This meal was pretty good. The crust is a little doughy, but very good.

So if you find yourself in a similar situation, don't pick up the phone and call for take out. Look at what you have and get creative. Misses liked helping me make this pizza. The lack of food in the house made for a fun activity and bonding time for us.


Sunday, December 30, 2012

New Year . . . New or Old Resolutions

With New Years Eve starting in about half an hour, I am compelled to think about some changes I want to make in 2013. I know, I know most resolutions don't make it past January 31, but I have been successful with some in the past. Therefore, I am hopeful each year as I make my list. Starting in the year 2013, I promise to . . .

1. Continue loosing the baby weight; I have about 15lbs to go.
2. Have a game night with Misses at least once a week
3. Sign Bubba up for swimming lessons
4. Go on a weekend vacation as a family
5. Organize, organize, organize

Five may sound like a lot, but each of these are things I already do. I just want to be more consistent in doing them. Except for the vacation. We haven't gone on a family vacation since Misses was 2 1/2. This year Bubba will be 2, so it should be completely doable to make this happen.

To loose the last of the baby weight, I will count my calories and go to the gym at least 3 times a week. I will have Misses pick a night, and that will be the night she get to stay up 30 minutes past her bed time to play games. We are members at the YMCA, so I will get a swimming schedule and sign Bubba up for lessons. I will be sure to get the items I need to organize either our hats and gloves, or the Christmas wrapping items.

As I complete each one, I will report back. This will help keep me accountable. What are your resolutions for 2013?

Sunday, December 2, 2012

Sugar and Spiced Glazed Pecans

**Update: I realized today that I do not microwave the butter, cinnamon, and brown sugar prior to mixing in the nuts. They still turn out great.***

Recently, I stumbled upon this super easy recipe to make glazed nuts in the the microwave on the cooks.com site. Yes, you read that right. Anyone can make those yummy glazed nuts, you pay way to much money for at the mall during the holidays in the MICROWAVE.

After finding this recipe and being very excited and sceptical, that I could make this happen with my microwave, I set out to do it. I have to say they are delicious and my house never smelled so good. Although, it doesn't take much to make my house smell better than normal, because I have one in diapers and he is stinky!

Anyway, back to the good stuff. Here is what you will need to make these yummy nuts.

Ingredients:

8oz. pecans (halves or pieces)
4tbls. butter
1/2c. brown sugar
1/2tsp. cinnamon

Put the butter in a microwave safe bowl. Microwave till melted.


Stir in cinnamon and brown sugar.
After that, stir in pecans and microwave for 3 minutes stirring 1-2 times.


 Spread pecans on wax paper and let cool.


As you can see, I failed to follow directions and used whole pecans. They still turned out great! Serve the nuts warm or cold. Make sure to store them in an air tight container.
 
 
Yes it is that easy! Enjoy and HAPPY HOLIDAYS!


Sunday, November 4, 2012

Thomas the Train Cake

My nephew turned 4 years old this past Saturday. For his birthday, I decided to make him a Thomas the Train cake. Naturally, like most 4 year old little boys, he loves trains especially, Thomas.

Since I am not a professional cake baker, nor a crafty lady, I set out on the internet looking for examples of Thomas cakes. I must say this was not the first "fancy" cake I have ever made. I make both Misses and Bubbas' cakes. So I kind of know some of the tricks to making these kinds of cakes. Once on the computer, I usually find the best examples with simple instructions on this site http://www.coolest-birthday-cakes.com . I chose one and set out with the best of intentions. The end result wasn't too shabby.

Here is how I made Thomas the Cake.

I bake my cakes from a box. So pick out the flavor you want and follow the directions for the pan size you need.

Pans needed to make Thomas the Cake

1. 2 loaf pans
2. 9x13 rectangle pan
3. 1 soup can

Yes, you read that right above. You will need to have soup for lunch and save the can. Remove the lid completely, rinse the can out and dry it thoroughly.

Ingredients

1. 2 boxes of cake mix
2. the ingredients required to make the batter

Mix up the batter for the 1st cake. This cake will go into the 9x13 pan. Bake as instructed.
Next, mix up the batter for the 2nd cake. This cake will need to be split between the 2 loaf pans and the soup can. Only fill the soup can 1/2 full at max or the cake will over flow. I naked all three of these in the oven at the same time. I had to play with the bake time. Initially, I put them in the oven for 25 minutes. At that time, they were not done, so I put them back in for 15 more minutes.

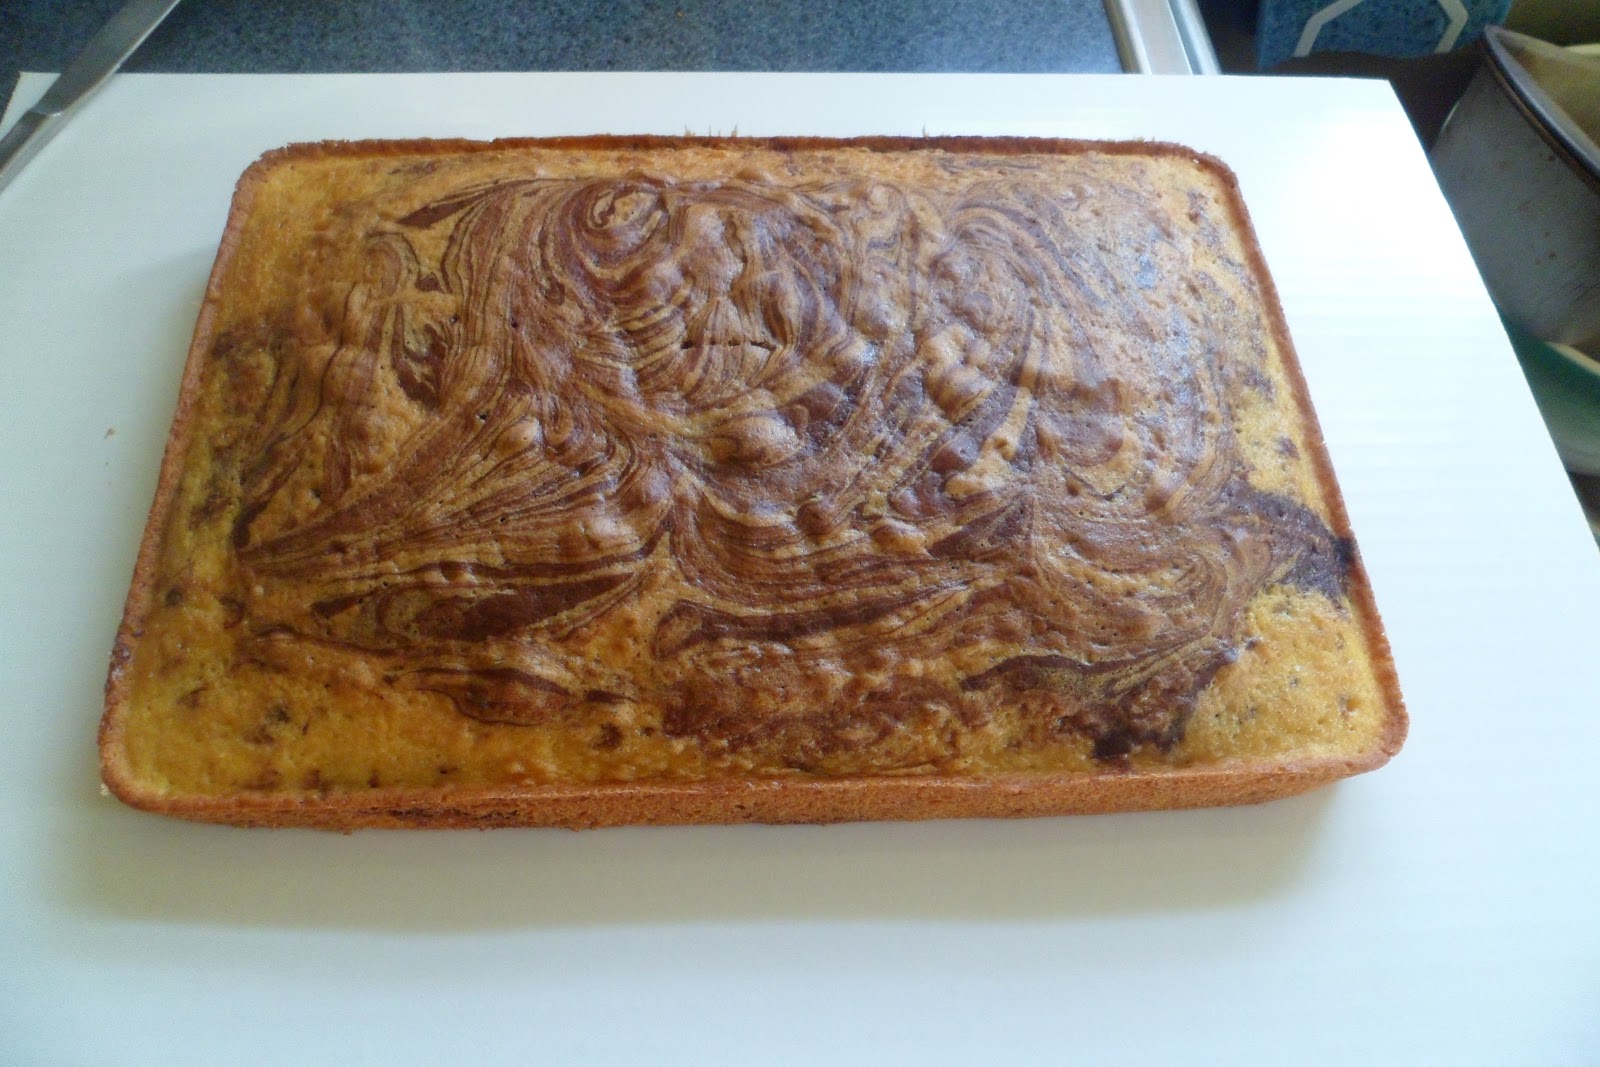
When all the cakes are made, let them cool completely. This is very important! Please do not try and remove a cake from the pan when it is warm. This will cause it to tear or crumble.

This is what your cakes should look like.


After all cakes are cool remove them from the pans and place them on a cardboard surface. The Wilton ones are great! They come in a pack of 6. I can't remember the price because I have had the same pack since February 2012. Now, place the cakes in the freezer. It is easier to work with a frozen cake.

Now it is time to make the frosting. This is the important part. You can make any old box cake taste great with a good frosting. I prefer butter cream frosting because it tastes good, is easy to work with, and sets up nicely.

Here is the recipe for Basic Vanilla Butter cream Frosting . . .

Ingredients

1c. unsalted butter (2 sticks or 1/2 pound), softened (but not melted) Ideal texture is like ice cream.
3-4c. confectioner (powdered) sugar, SIFTED
1/4 tsp. table salt
1 Tb. vanilla extract
up to 4 Tb. milk or heavy cream. (I use whole milk.)
Food coloring (if you want to color it)

Instructions

Beat butter for a few minutes with a mixer on medium speed. Add 3c. of powdered sugar. Be sure to turn the mixer speed down, or you will have a mess! Mix until the sugar is Incorporated with the butter. Increase mixer speed to medium and add vanilla, salt, and 2Tbl. of milk/cream and beat for 3 minutes. During the 3 minutes, if you want to color your frosting, add it now. If the frosting needs to be thicker add a bit more sugar. If it needs to be thinner, add some more milk/cream 1 Tb. at a time.

*Warning* Don't taste it! If you do, you will not be able to stop tasting it. :)

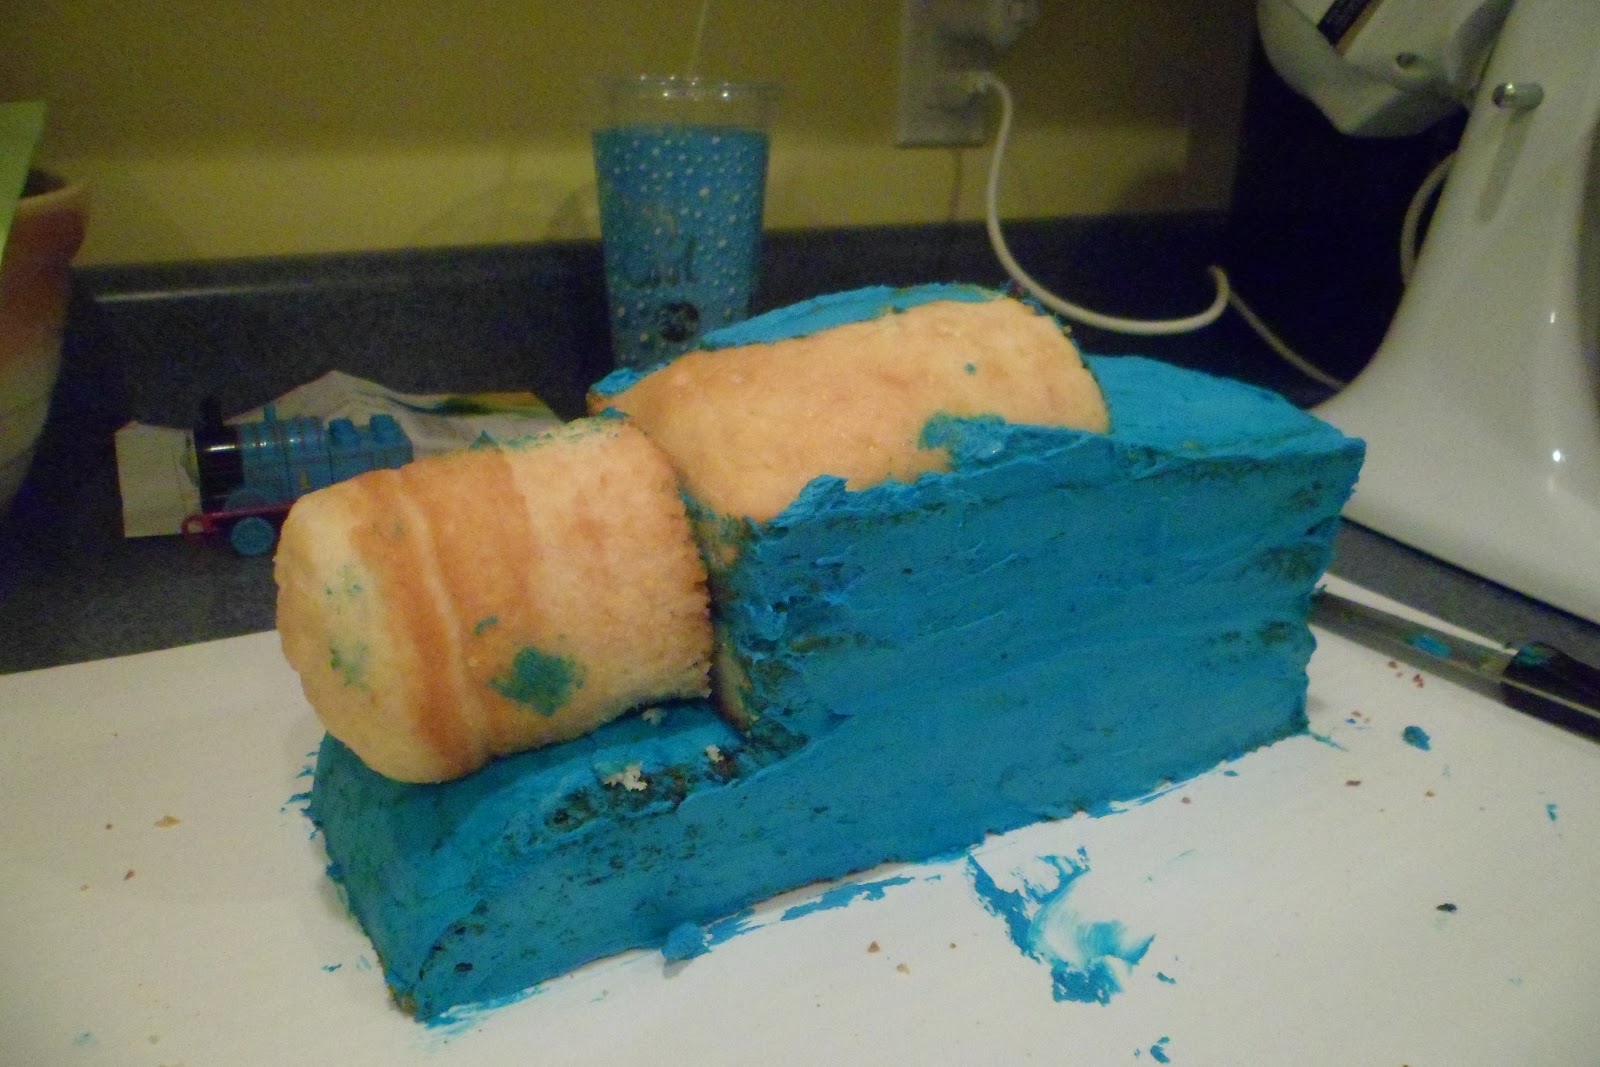
Time to build the cake! Take your cake out of the freezer. Put one loaf cake on top of the 9x13 cake. Take a BIG knife and cut the long sides off the the cake so it is now the width of the loaf cake. Take the loaf cake off  and cut each loaf cake in half long ways. Now stack the 2 bottoms on top of the 9x13. This makes Thomas' coal pit. Then take the tiny soup can cake and place it on it's side in front of the loaf cakes to make Thomas' boiler. You may need to shave off some of the side so that it will lay nicely on the 9x13. Finally, shave off the front of the 9x13 to make it rounded.

Once you have your shape, it is time to "paste" it altogether. The frosting is your glue. Take all the pieces off and frost the bottom most layer. No need to be perfect or heavy with this layer. This will not be seen and it is called the crumb layer or paste, as I like to call it. It should look similar to this.

 
The complete crumb layer.

Sorry, I don't have photos of all the steps. Time is not on your side when working with cakes. So I had to work quickly to make sure it was constructed before it thawed.

***Note*** Make sure to keep the scraps that you cut off, because you may need them to support   some layers or add to the shape. As you can see in the photo, I had to use part of the top of the loaf cake to make the half moon shape of the top.

Finish adding the crumb layer and put it back in the freezer. This will help the cake maintain it's shape and freeze the 1st layer of frosting, so you can add the next layer without the cake crumbles messing it up. I usually leave the crumb layer on to freeze over night.

When it is completely frozen take it out and start frosting the cake. I recommend using a cake spatula over a butter knife. I used one of these with this cake and it worked so well. Thankfully, my mother in law use to own a cake shop, and she gave me one! Thanks Debby.

***Note*** Certain frosting colors are very difficult to make. I recommend buying frosting if you need black or red. So for this cake I used the Betty Crocker spray can for the black, red                and yellow frosting. I could have made the yellow, but I didn't want to make a whole new batch for such a small part of the cake.

Thomas minus his face.
 
 
Thomas' wheels are Oreo cookies frosted and stuck on the sides. His coal is crushed Oreo cookies. I dug out part of the top of the cake so they wouldn't fall off. The smoke stack is a Tootsie Roll. Looking back I should have frosted it. The rest is all frosting even the track.


Thomas' face is a paper print off from the internet that I cut to fit and pressed on to the frosting.


Thomas is far from perfect, but I'm not Duff Goldman. My nephew loved it and it tasted good, so that is all that matters. I hope that this helps you make a Thomas cake or helps with whatever kind of "fancy" cake you may want to make. Good luck it isn't as hard as it looks.


Thursday, November 1, 2012