Sunday, November 4, 2012

Thomas the Train Cake

My nephew turned 4 years old this past Saturday. For his birthday, I decided to make him a Thomas the Train cake. Naturally, like most 4 year old little boys, he loves trains especially, Thomas.

Since I am not a professional cake baker, nor a crafty lady, I set out on the internet looking for examples of Thomas cakes. I must say this was not the first "fancy" cake I have ever made. I make both Misses and Bubbas' cakes. So I kind of know some of the tricks to making these kinds of cakes. Once on the computer, I usually find the best examples with simple instructions on this site http://www.coolest-birthday-cakes.com . I chose one and set out with the best of intentions. The end result wasn't too shabby.

Here is how I made Thomas the Cake.

I bake my cakes from a box. So pick out the flavor you want and follow the directions for the pan size you need.

Pans needed to make Thomas the Cake

1. 2 loaf pans
2. 9x13 rectangle pan
3. 1 soup can

Yes, you read that right above. You will need to have soup for lunch and save the can. Remove the lid completely, rinse the can out and dry it thoroughly.

Ingredients

1. 2 boxes of cake mix
2. the ingredients required to make the batter

Mix up the batter for the 1st cake. This cake will go into the 9x13 pan. Bake as instructed.
Next, mix up the batter for the 2nd cake. This cake will need to be split between the 2 loaf pans and the soup can. Only fill the soup can 1/2 full at max or the cake will over flow. I naked all three of these in the oven at the same time. I had to play with the bake time. Initially, I put them in the oven for 25 minutes. At that time, they were not done, so I put them back in for 15 more minutes.

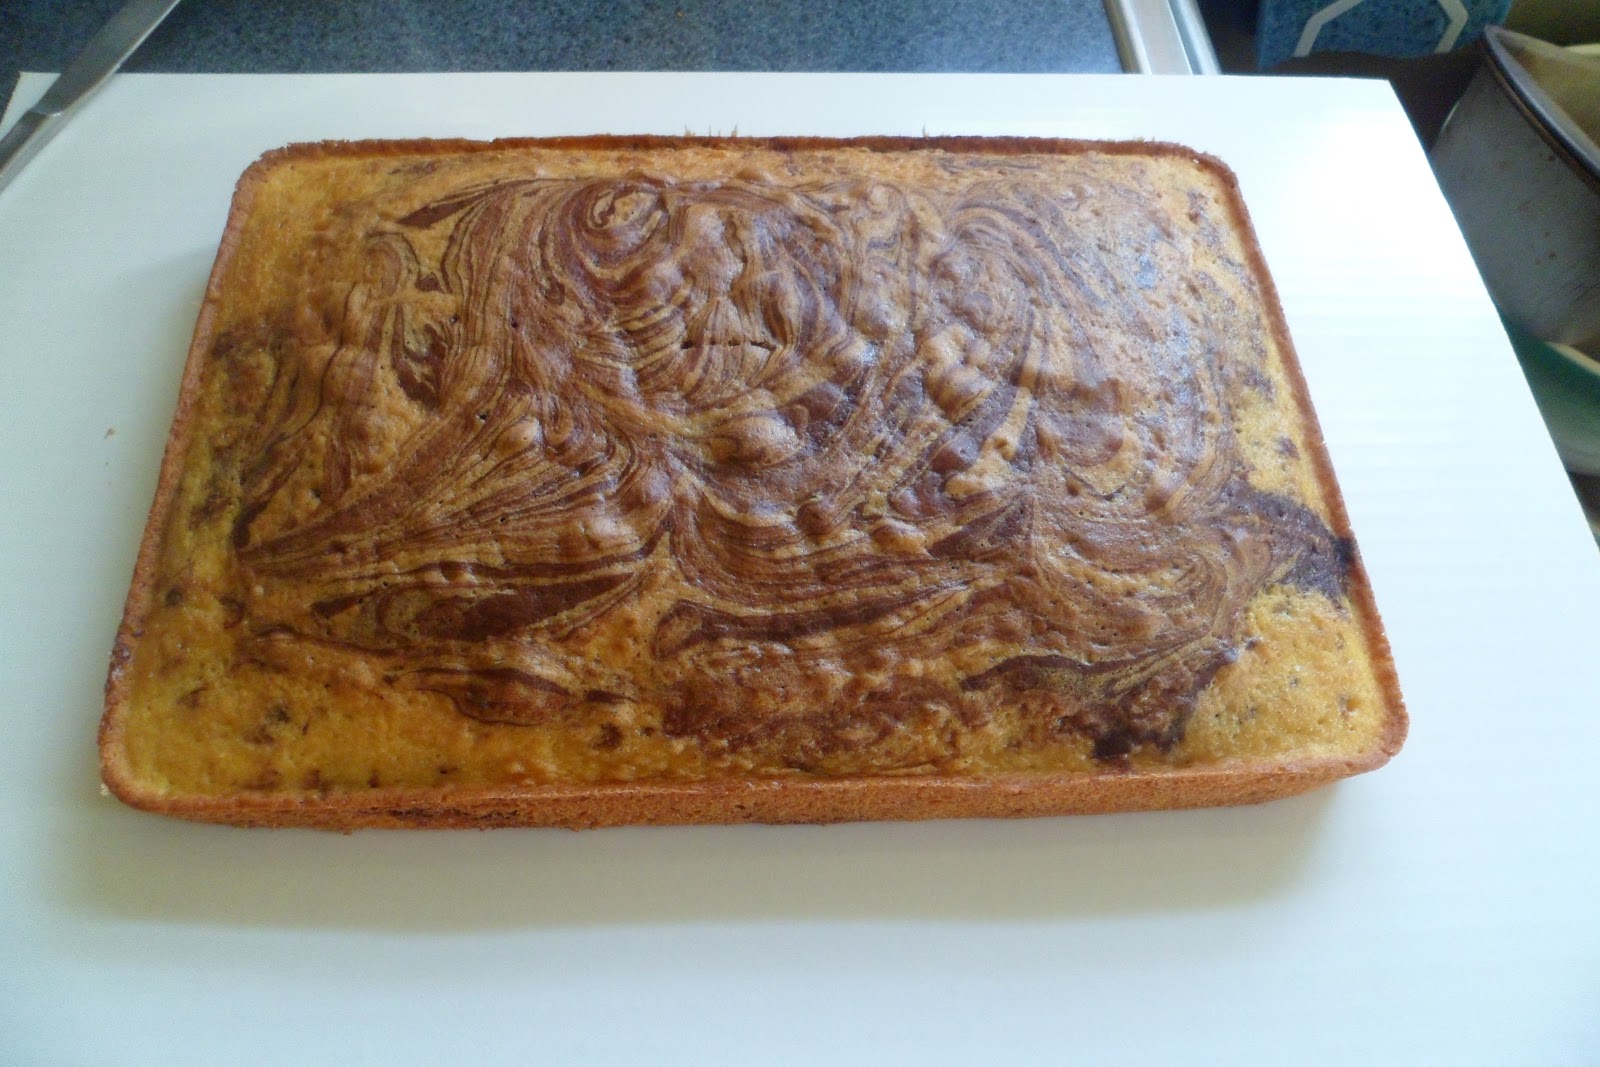
When all the cakes are made, let them cool completely. This is very important! Please do not try and remove a cake from the pan when it is warm. This will cause it to tear or crumble.

This is what your cakes should look like.


After all cakes are cool remove them from the pans and place them on a cardboard surface. The Wilton ones are great! They come in a pack of 6. I can't remember the price because I have had the same pack since February 2012. Now, place the cakes in the freezer. It is easier to work with a frozen cake.

Now it is time to make the frosting. This is the important part. You can make any old box cake taste great with a good frosting. I prefer butter cream frosting because it tastes good, is easy to work with, and sets up nicely.

Here is the recipe for Basic Vanilla Butter cream Frosting . . .

Ingredients

1c. unsalted butter (2 sticks or 1/2 pound), softened (but not melted) Ideal texture is like ice cream.
3-4c. confectioner (powdered) sugar, SIFTED
1/4 tsp. table salt
1 Tb. vanilla extract
up to 4 Tb. milk or heavy cream. (I use whole milk.)
Food coloring (if you want to color it)

Instructions

Beat butter for a few minutes with a mixer on medium speed. Add 3c. of powdered sugar. Be sure to turn the mixer speed down, or you will have a mess! Mix until the sugar is Incorporated with the butter. Increase mixer speed to medium and add vanilla, salt, and 2Tbl. of milk/cream and beat for 3 minutes. During the 3 minutes, if you want to color your frosting, add it now. If the frosting needs to be thicker add a bit more sugar. If it needs to be thinner, add some more milk/cream 1 Tb. at a time.

*Warning* Don't taste it! If you do, you will not be able to stop tasting it. :)

Time to build the cake! Take your cake out of the freezer. Put one loaf cake on top of the 9x13 cake. Take a BIG knife and cut the long sides off the the cake so it is now the width of the loaf cake. Take the loaf cake off  and cut each loaf cake in half long ways. Now stack the 2 bottoms on top of the 9x13. This makes Thomas' coal pit. Then take the tiny soup can cake and place it on it's side in front of the loaf cakes to make Thomas' boiler. You may need to shave off some of the side so that it will lay nicely on the 9x13. Finally, shave off the front of the 9x13 to make it rounded.

Once you have your shape, it is time to "paste" it altogether. The frosting is your glue. Take all the pieces off and frost the bottom most layer. No need to be perfect or heavy with this layer. This will not be seen and it is called the crumb layer or paste, as I like to call it. It should look similar to this.

 
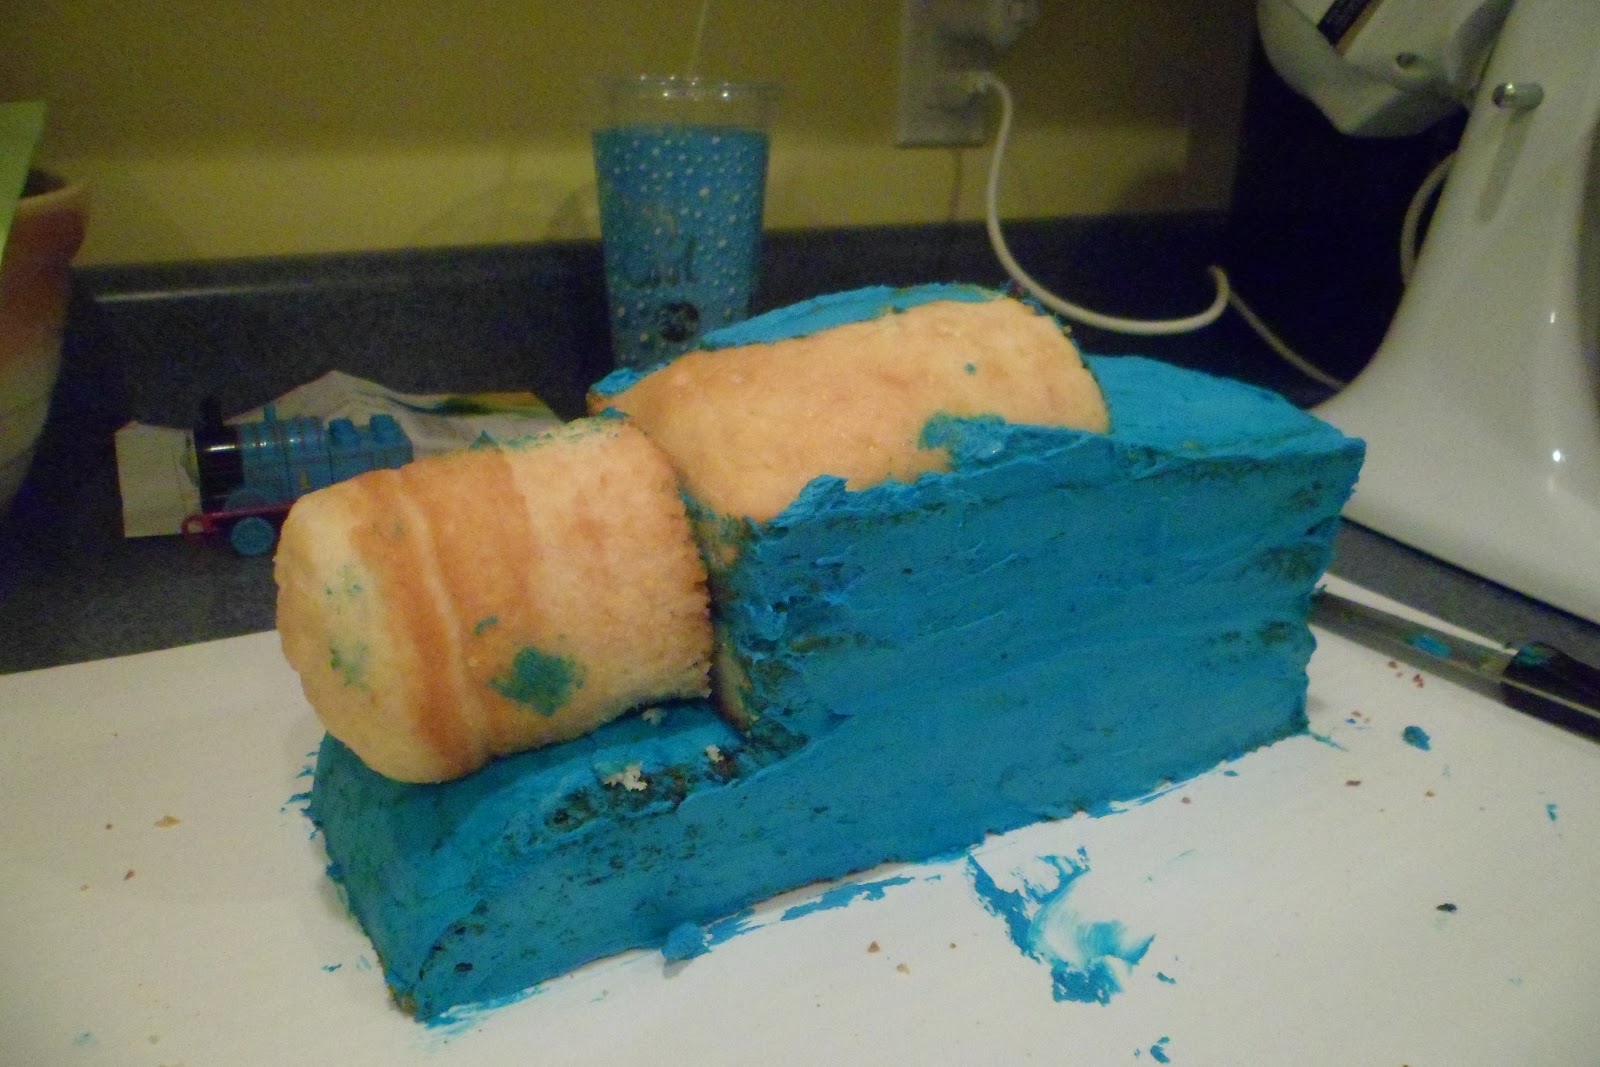
The complete crumb layer.

Sorry, I don't have photos of all the steps. Time is not on your side when working with cakes. So I had to work quickly to make sure it was constructed before it thawed.

***Note*** Make sure to keep the scraps that you cut off, because you may need them to support   some layers or add to the shape. As you can see in the photo, I had to use part of the top of the loaf cake to make the half moon shape of the top.

Finish adding the crumb layer and put it back in the freezer. This will help the cake maintain it's shape and freeze the 1st layer of frosting, so you can add the next layer without the cake crumbles messing it up. I usually leave the crumb layer on to freeze over night.

When it is completely frozen take it out and start frosting the cake. I recommend using a cake spatula over a butter knife. I used one of these with this cake and it worked so well. Thankfully, my mother in law use to own a cake shop, and she gave me one! Thanks Debby.

***Note*** Certain frosting colors are very difficult to make. I recommend buying frosting if you need black or red. So for this cake I used the Betty Crocker spray can for the black, red                and yellow frosting. I could have made the yellow, but I didn't want to make a whole new batch for such a small part of the cake.

Thomas minus his face.
 
 
Thomas' wheels are Oreo cookies frosted and stuck on the sides. His coal is crushed Oreo cookies. I dug out part of the top of the cake so they wouldn't fall off. The smoke stack is a Tootsie Roll. Looking back I should have frosted it. The rest is all frosting even the track.


Thomas' face is a paper print off from the internet that I cut to fit and pressed on to the frosting.


Thomas is far from perfect, but I'm not Duff Goldman. My nephew loved it and it tasted good, so that is all that matters. I hope that this helps you make a Thomas cake or helps with whatever kind of "fancy" cake you may want to make. Good luck it isn't as hard as it looks.


Thursday, November 1, 2012

Wednesday, October 31, 2012

Chicken Noodle Soup (Just like the Can)

For about three years, I have been making chicken noodle soup from semi-scratch. It is very delicious and easy to make. And inexpensive to boot!

Since it is Fall and many people like to cook up soups to freeze during this time, I thought I would share this recipe. Before I start, I need to give credit where credit is due. I didn't invent this recipe. The great Paula H. Dean did and the original is in her cookbook titled: The Lady & Sons Savannah Country Cookbook. I will be sharing my version of this awesome soup. The original makes a creamy chicken noodle soup. I don't care for creamy soups, so I leave out the ingredients that make it a creamy soup.


Here it goes . . .

Chicken Noodle Soup (Just like the Can)
serves 8 to 10
 
Step 1


Ingredients:

One 2 1/2 to 3lb fryer chicken
3 1/2 quarts water
1 onion, peeled
1 1/2  to 2 tsp. Italian seasoning
1 tsp lemon-pepper seasoning
3 cloves garlic, minced
3 chicken bouillon cubes
salt and pepper to taste.

***Note: I use whatever chicken is on sale. I have made this with fryer chicken, boneless chicken breast, split chicken breast, and chicken thighs. Turns out great every time.


Add all ingredients to a big pot. Cook until chicken is tender, about 35 minutes. Remove chicken from pot and set aside to cool. Remove and discard onion. Keep the stock in the pot. De bone the chicken when it is cool to touch.

Step 2

Ingredients:

2 c. sliced carrots
2 c. sliced celery
2 1/2 c. uncooked egg noodles (regular or whole wheat)
3 Tbs. dried or fresh parsley
1/3 c. cooking sherry (optional)
Salt and pepper to taste

Bring stock back to boil, add carrots, and cook for 3 to 5 minutes. Add celery and cook 5 minutes. Add egg noodles and cook according to package directions. When the noodles are done, add the chicken and sherry. Cook for another 2 minutes. Add salt and pepper to taste.

I hope you like this version of the Chicken Noodle Soup. It freezes great!


Saturday, October 27, 2012

Savy Christmas Savings on Kids Gifts


 http://shortcutstofabulous.com/category/saving-money/
A couple of years ago a friend told me that she was going to buy Halloween Costumes after Halloween for the next year. As soon as she said it, I thought, what a great idea! The costumes are very cheap after Halloween. Honestly one can save up to 90% on any costume. So for the past two years, I have gotten my kids costumes for the next year for next to nothing.

I know what you are thinking. How do I know what my kids will want to be the next year? The answer is, I don't. I buy two costumes for each child and then as Halloween draws near, I pull them out and ask them which they want to be. If they don't want either of them, I tell them that is fine, but I am not buying another. So they have to choose one of the ones I have bought or go to the dress up bin and  make a costume. This has worked out well for my family and for my friend's family.

This year I am planning on taking this savings even further. Over the past couple of years, I have down sized Christmas. My husband and I set a budget and only pay cash for the gifts we buy. We sat down the other day to plan out our Christmas budget, and I started thinking most kids love dress up. Boys and girls alike enjoy putting on costumes, clothes, and accessories while playing. So this year, I am buying Halloween Costumes after Halloween to give as Christmas gifts.

Today we stopped in Menards to buy dog food and honey. The kids wanted to check out the Halloween isle. I saw that they had Batman masks for $1.99! These are not the cheap thin plastic ones either. They are the nice heavy duty ones. So I picked one up for all the little boys on my Christmas list. Then I got Bubba two Marvel Comic costumes for $3.99 each. One he will get for Christmas, and the other I will save for next Halloween. The costumes were originally marked at $29.99. This was a great savings trip to the store.

Some people may think that this strategy is cheap especially after they read the following. When I budget for Christmas, I decide on a total dollar amount to spend. Then I break that amount down between the people on my list. However, I bargain shop, so if I find a gift on sale for $5.00 but it original cost $20.00 and my budget for that person is $20.00 my shopping for that person is complete. I don't continue to find more gifts to make it to the $20.00 limit. I then take the difference and save it.

I hope this helps all who read it find a way to buy great useful gifts for the children in their lives without breaking the bank. Not to mention the costume you buy for dress up may end up being a Halloween Costume too! Happy Holidays everyone. There will more money saving posts throughout the season, so check back. Also, If you have a great cost saving gift giving method . . . please share.


Sunday, October 14, 2012

Glade Expressions Collection

Here's the Bzz!

Glade Expressions(R) Collection

Glade Expressions Collection is a new line of Glade products. As a Bzz Agent, I was selected to try these new products in my home and spread the word by giving my opinion on them.

When I received my Bzz Kit, I opened it to find coupons to go to the store and purchase the two products you see in the picture above. I chose the pineapple and mongosteen for the oil diffuser, because that was the only scent my local store carried. For the fragrance mist, I chose the cotton and Italian mandarin scent, because I love the smell for fresh linens.

I returned home with my goodies and quickly got them set up. At first I was really pleased with the strength of the oil diffuser scent. Also, I liked that the container matched my decor very well. It was a plus that it would not spill if knocked over. Since I have small children, a dog, and a cat this is important to me. However, the next day, I couldn't smell the diffuser at all. Every now and again, if I were right next to the diffusion I could smell it.

The fragrance mist has a great smell and is very easy to use. Pretty much it is just and aerosol can in a prettier case. There is a one time purchase of a starter kit that contains on can of mist and the pretty case to put it in. The case is nice a looks good sitting on the counter or on the back of the toilet. In my house no one will see it, because with small children, I will not put anything out that they could get a hold of and possible poison themselves.

In the end, I am glad I was chosen to try these products. They do make my home smell nice for awhile without the use of electricity. However, I wish the smell would encompass the entire room with the diffuser. In the coming years, the appealing canister for the mist will be a nice addition to my bathroom, but until my children are older, I won't be spending the extra money on it to put it under the counter.

**Note** As a Bzz Agent I was given these products to review. All opinions are mine and no
                 compensation was given.

Saturday, October 6, 2012

Cookie Press . . . Oh How I Wish I Knew You Sooner.

Today I used the coolest kitchen gadget ever! It is the Pampered Chef Cookie Press. I have to say in advance, I am not reviewing the product. I am just sharing my experience and awe at how much easier it will make my cookie baking days. Since it was pretty chilly today, Misses and I decided to bake some sugar cookies from semi-scratch.
A big thanks to Kelly for picking this up for me at a garage sale for $2.00!


Let me explain the semi scratch . . .
Some time ago, I stumbled across this incredibly informative blog written by a woman who's family was transferred overseas. She quickly found that many of our U.S. "quick and easy" mixes and cleaning products were not available in her new home. So she found a way to make them. In doing so, she also found that making them saved her some $$. One of the things she makes is the bagged Betty Crocker Cookie Mixes. You know the ones that look like this . . .

Sugar Cookie Mix

So Misses and I made about four batches two sugar and two chocolate chip. They store for up to six months in storage bags in a pantry and up to a year in the freezer. If you want to check this out here is the blog, http://fakeitfrugal.blogspot.com/2012/02/fake-betty-crocker-cookie-mixes.html.

My little cookie artist.
 
The finished product.

Lets get back to the coolest kitchen gadget. All you have to do is make the dough and fill the cookie press. Then put the cookie shape disk you want in the cap. Pull the trigger while the press is pressed against the pan. Lift up and viola! Pretty cookies! Bake and decorate! Enjoy!

Thursday, September 13, 2012

Spooky Bats Halloween Craft

I know I have said before that I am very thankful for Pinterest. I am not the craftiest of people, hence the blog title, so I seek ideas and directions on crafts to do with my kids on a regular basis. Last week I finally sat down and made a list of the Fall crafts I wanted to do with the kids in the next few weeks. Spooky Bats are easy and we did them, because I had all the materials on hand except the googly eyes. So we set out to make the bats.

What you need.
  • a cardboard egg carton
  • black paint
  • ribbon
  • googly eyes
  • paint brush
I must say that we didn't have finger paint either, so I looked up a recipe on how to make our own. Here is the recipe . . .

1c water
1c flour
food coloring

Mixed the flour and water in a bowl till smooth. Add food coloring to make the color you want. Done! This turned out to be a great learning opportunity for Misses, because she had to mix the colors to create black and orange.

Check out the final product done by Misses (4) and Bubba (1)!

Bubba got board and ate some paint, but who cares it's just flour and water!

Our Spoooooky Bats hanging from the fan.
They aren't completely black because Misses got tired of mixing.